
On-prem Exchange did not allow message tracking via the Exchange admin center. In Office 365, EAC enables message tracing and offers quite a comfortable experience. Although usually I prefer administrating Exchange Online with PowerShell, I must say that in this case, EAC seems to do its job very efficiently.
Note: It was also possible to perform a message trace in the Microsoft 365 Security and Compliance center. However, Microsoft announced this method is blocked after November 2021 (it was rescheduled from October 5, 2021).
To access Message trace, you can either use this link, or go to Exchange admin center > Mail flow > Message trace:

Now, you can either click Start a trace to specify your search criteria from scratch or use one of the templates available below. Templates open the same New message trace window, but they have some fields predefined.
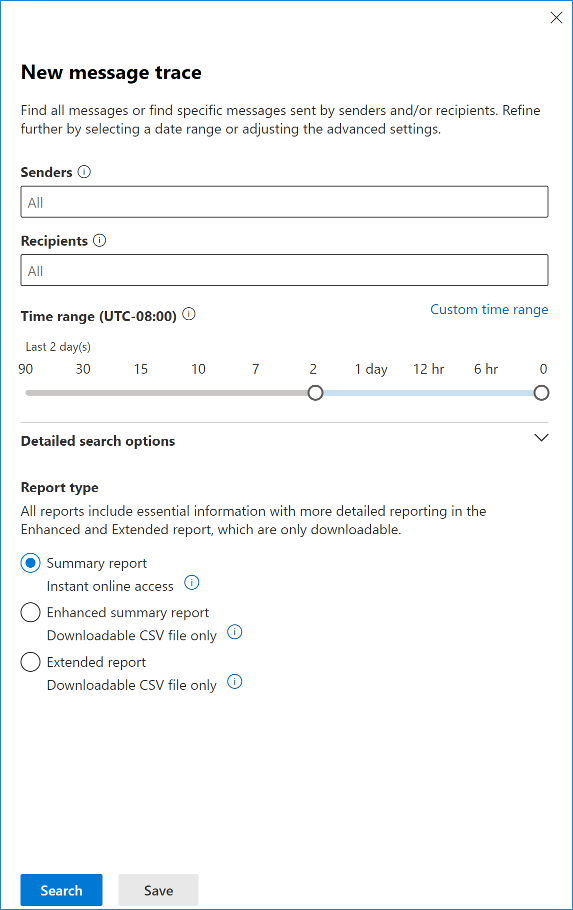
This window lets you define the criteria for the reports you want to generate. You can define the following criteria:
- Senders – defines senders the tool will incorporate in the reports. The field accepts wildcards, which allows you to easily limit results for a certain domain.
- Recipients – similar to the Senders fields, it accepts wildcards.
- Time range – can be configured by using a slider or entering a custom time range.
Additionally, you can click Detailed search options to make your query even more granular:
- Delivery status – lets you search only for the emails which were, for example, successfully delivered or quarantined. For a list of all available statuses and what they mean, see this section of the article.
- Message ID – lets you find a specific message. Message ID can be found in the email’s headers.
- Direction – lets you choose from Inbound, Outbound and All.
- Original client IP address.
Remember, tracing messages older than ten days is treated like a Historical Search, no matter if you use EAC or PS. It means that you will have to wait for your reports either way. Generating the reports might take up to a few hours. If you trace messages from the past ten days, clicking search will open a window with the results:
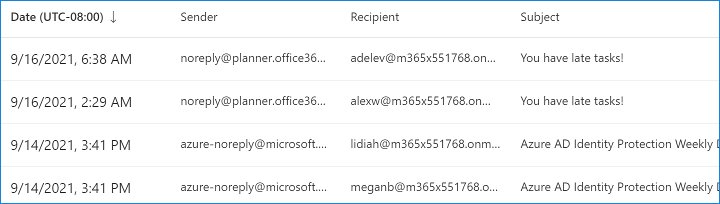
If you want to see details for a chosen email, click it, and a new window will open:
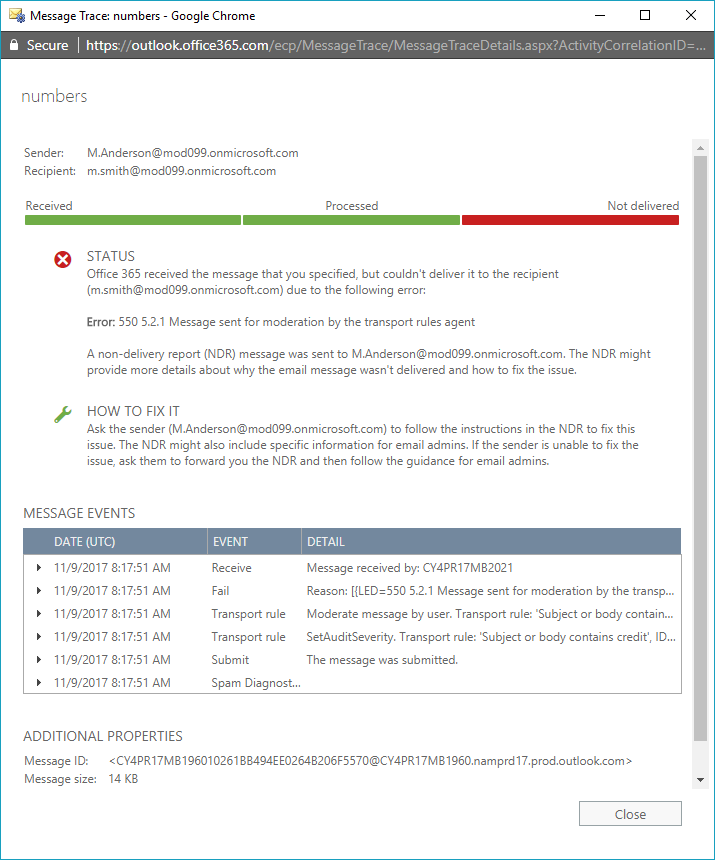
In this window, you can check what happened to the message. In the example above, you can see that the delivery failed because of a transport rule. You can easily check which transport rule caused the problem and fix the issue.
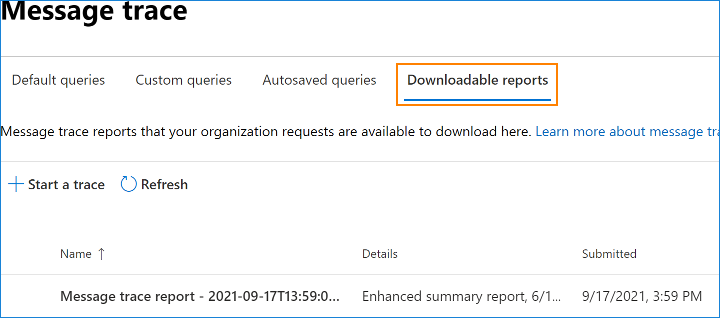
Back in the main message trace window, you can go to Downloadable reports tab to see a list of the historical searches and extended reports you have requested. If you have started a Historical Search using PowerShell and failed to specify the –NotifyAddress parameter, this is the only place to learn if the message trace is finished and to download the csv file with your report.
The downloaded report is in the CSV format. Each row displays information about a single email. To make your report more readable, you can open it in Excel or another spreadsheet.